Writing Your Lesson Plans
How Do I Create a Lesson Plan?
There are many ways to start writing lesson plans, and they are all outlined below. After you have created a lesson plan format you prefer to use for all your lesson plans, you can save a lesson plan as a template and start with a template to write all your subsequent lesson plans. You must start by creating a lesson plan before you will be able to create a template because your templates will come from your lesson plans, and not the other way around. Let's begin with learning the basics of how to write a lesson plan. There is separate tutorial for how to make your templates.
Writing Lesson Plans Starting From Your Workspace -- Under the Lesson Planning section at the top, you will see all of your choices for starting lesson plans. You can choose to write your plans using the Wizard, begin a new subject plan or daily plan from scratch, or start by going to the Lesson Plan Library or the Sample Lesson Plans.
Writing Lesson Plans Starting From the Lesson Plan Dashboard -- You can navigate to the Lesson Planning Dashboard by mousing over Lesson Planning on the top bar. From the Lesson Planning Dashboard, you will see a box on the left for creating lesson plans.
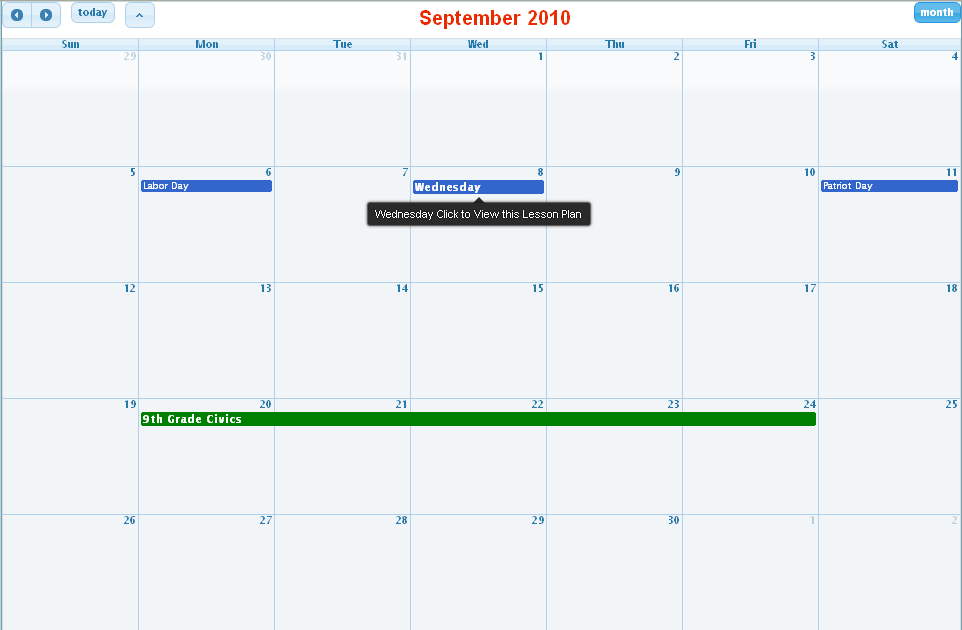
>Writing Lesson Plans Starting From Your Calendar-- click on a date on the calendar. You will see a box, and you'll choose the option for lesson planning that best fits your needs.
Writing Lesson Plans Starting From an Existing Lesson Plan-- you can click on the Date Management icon at the top of any lesson plan and copy a new lesson plan to a new date. Or you can cntrl-click-drag to copy and paste an existing lesson plan to a new date right from your calendar.
Where to Begin
Creating Lesson Plans from My Workspace

To get to My Workspace, mouse over Quick Links and choose My Workspace.The Workspace is divided into different sections for lesson planning and classroom management. The top section is for Lesson Planning. You can create lesson plans by clicking on The Wizard, Subject Lesson Plan, Daily Lesson Plan, or the Library. Once you have created lesson plans and saved some as templates, you can choose a template to start your lesson plans.
Lesson Plan Wizard
The Lesson Plan Wizard is great for novice teachers just getting started with lesson planning. It walks you through each step and gives examples along the way. When you choose the Wizard option, you will first give your lesson plan a title, then choose whether you would like to use the Daily or Subject Lesson Planning option. These are the Wizard steps:
Step 1: Select Standards
Step 2: Write an Objective
Step 3: Lesson Activities
Step 4: Lesson Set
Step 5: Save
Using the Wizard creates a lesson block in the Daily Lesson Plan or a Day Block in the Subject Lesson Plan.
Lesson Plan Library
The Lesson Plan Library allows you to find Lesson Plans that other teachers are sharing. It's a great way for you to get a head start planning your lessons. You can view lesson plans from the Library, and once you find a lesson plan you want, you can add a Library lesson plan to your own lesson plans by clicking the small yellow box with a green plus sign.
To Quick Preview the lesson (separate window and you won't leave the page), click on the left small yellow box. To navigate to the full lesson plan, click the second yellow preview box icon. To add the lesson to your lesson plans, click on the third yellow box with the + inside, and choose the date where you want to copy the lesson plan, and the lesson from the library will appear as your own lesson plan. The last icon, if available, allows you to merge the lesson plan with your own lesson plans. This feature is only available for daily lesson plans, and all lesson blocks from the lesson plan will merge with the lesson plan already existing on the date you choose. Using the Library is a great way to get started as a new user, or to share lesson plans with other teachers.
Starting From Scratch
You can create lesson plans by creating one lesson block at a time on the Daily Lesson Plan, or one day at a time on the Subject Lesson Plan. Once you are comfortable using My Lesson Planner, you may want to use this option to set up your templates, but you won't use this option for day to day lessons. Most teachers will use their own templates to begin lesson plans or use the library.
To create a lesson plan from scratch, you will choose to create a subject or daily lesson plan from the Calendar,your Workspace, or the Lesson Planning Dashboard. If you have chosen the Daily Lesson Plan, you will click on the Create Lesson Block icon at the top of the page to build your lesson plan, block by block. If you have chosen the Subject Lesson Plan, you will click on the day of the week.
![]()
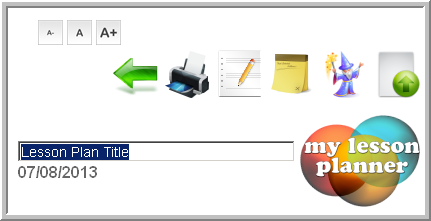
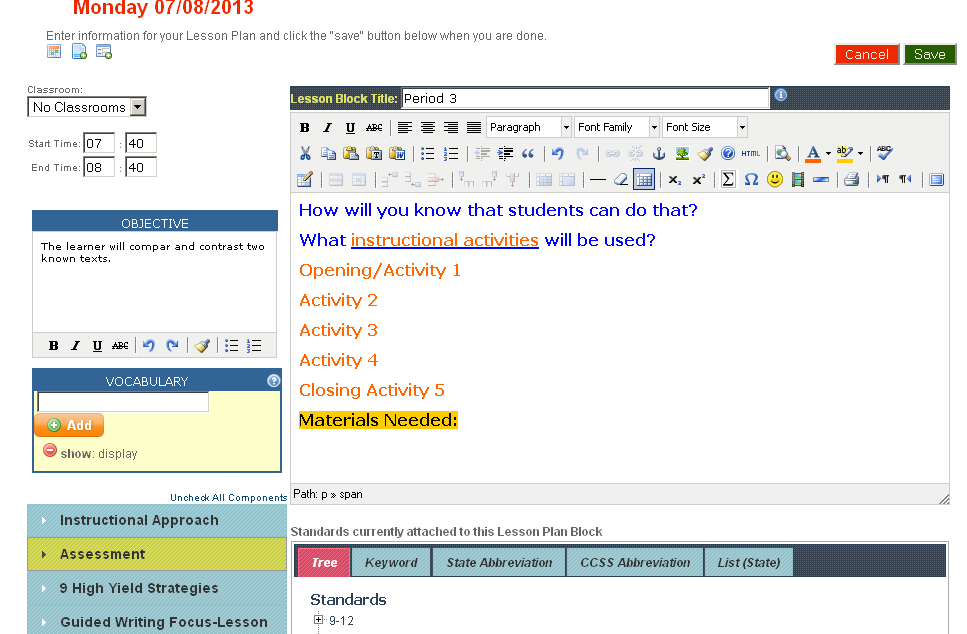
Giving your daily or subject lesson plan a title is optional. If you create multiple subject lesson plans for one day, you will want to title your lesson plans (i.e. Civics, World History). However, if you teach one group of students and use the daily lesson planner like a schedule, your date is most likely all you need for a title. To change the title of the lesson plan, simply click on the Title wording, and you can type the new title name. Clicking Enter or clicking away from the Title box will save the title.
For the Daily Lesson Plan, you will begin by clicking the icon for adding a lesson block. If you are using the subject lesson plan, you will click on the day of the week on the left side.
If you have set up classrooms and/or groups in your preferences, you can choose a classroom and group for the lesson. If not, simply ignore those fields. Type the Start and End time for this lesson in the time field. Not entering a time will not affect your lesson plan. It is simply your choice.
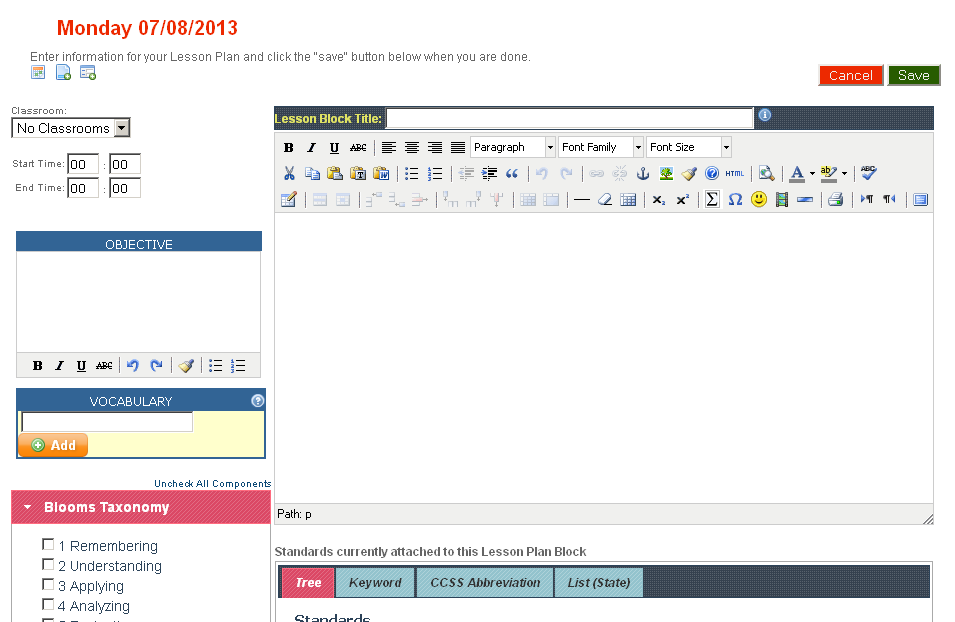
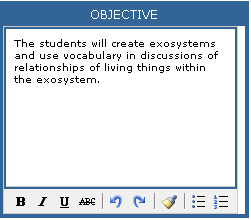
Objectives
Type your objective directly in the box. (Note: If your district has pre-aligned objectives that match your standards, the curriculum mapping option allows for the objectives to be preset with the standards so that the objective will come with the standard once the standard is chosen. This option is only available for school or district accounts.)
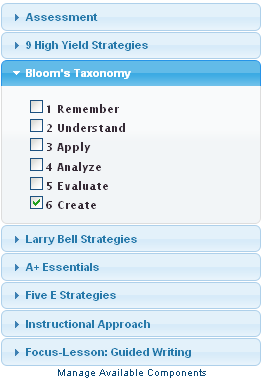
Lesson Plan Components
Components allow you to document with a click to show aspects of your lesson plan. Choose the Components to the left that you want to indicate on this this lesson by clicking, and the choices will drop down. When you want to hide them, just click on the Component again. The lesson plan components are optional, so if you don't see something you want to see, or if you don't want to see some of the Components, go to Preferences to indicate what you do and don't want to see.
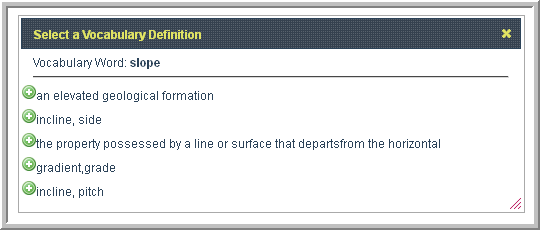
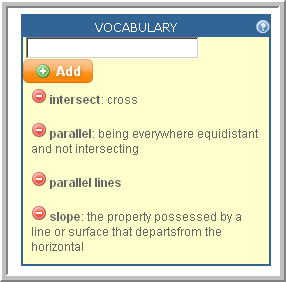
Vocabulary
The Vocabulary component will put the definition of your vocabulary words right in your lesson plans. You can choose to show or not show Vocabulary in your Preferences. Type the word and click the green arrow, and the definition will appear. Only type in one word at a time. If you don't see the definition you were wanting, try another form of the word (i.e. add--addition). The definitions are subject to the web-dictionary and are not customizable. If the definition you want isn't there, you will have to enter that vocabulary word in the body of your lesson plan notes.
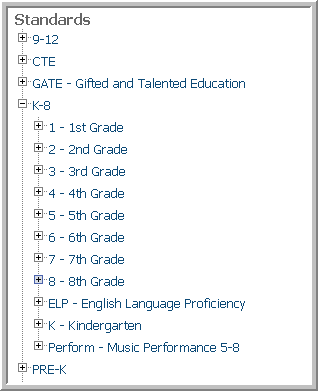
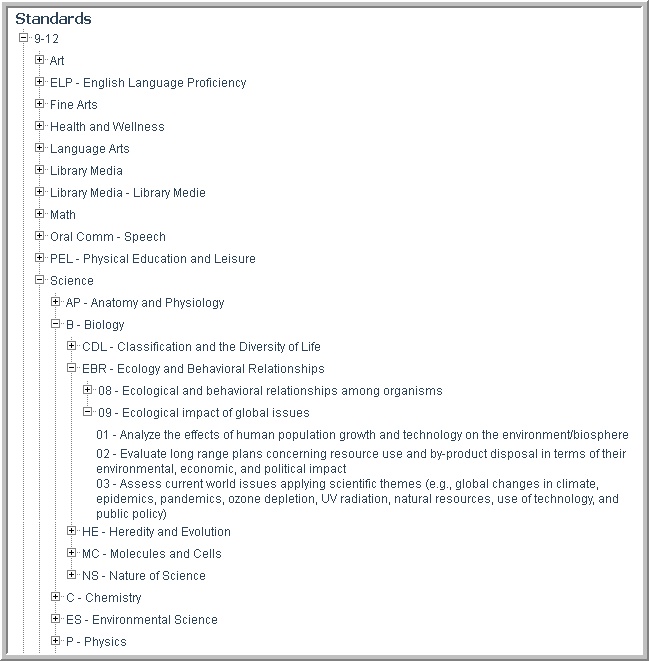
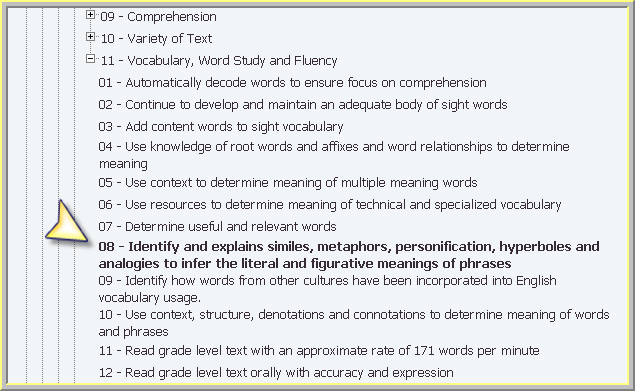
Adding Standards
To add standards to your lesson plans, look just below the lesson notes box. You can choose standards by looking at them in the Tree View or in the Key Word Search. The search option you choose in your Preferences will always be the first you see, but the other is always available.
My Lesson Planner will remember the standards you have taught and put a check-mark by them if you choose that option in My Preferences.
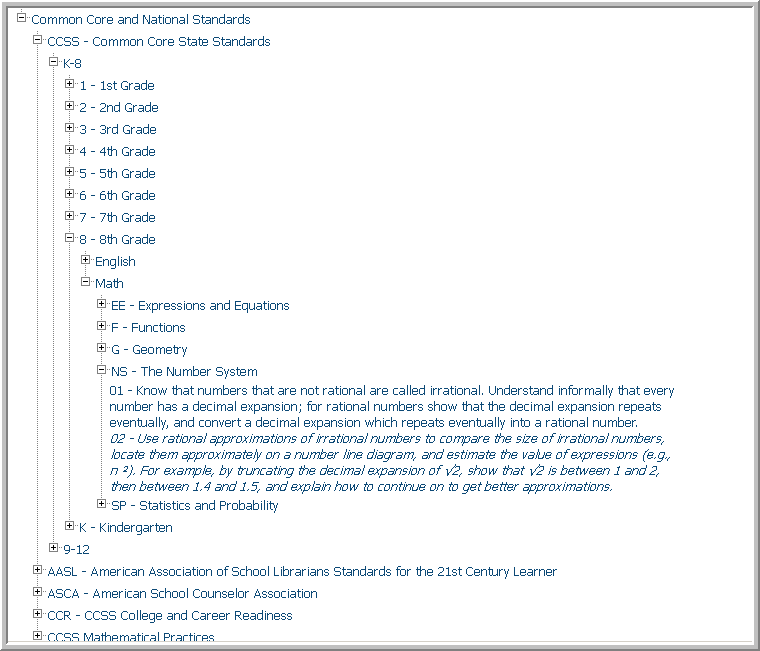
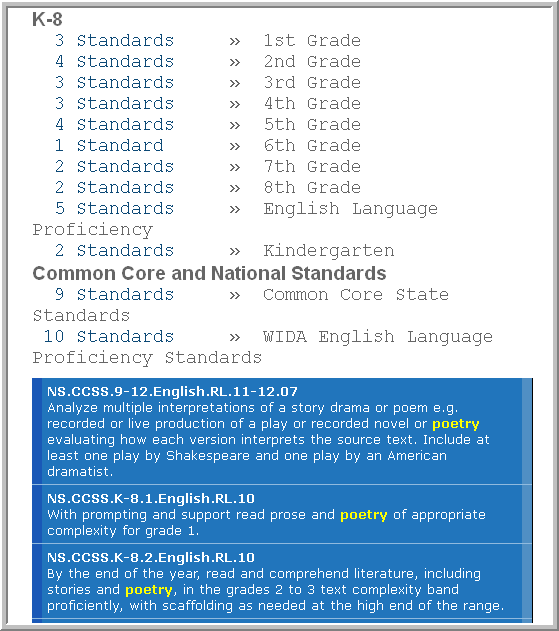
Once you find the standard you want, click on the standard, and scroll up to see the standards begin to add to the lesson plan in the box under the lesson plan notes box.:
Once the standards are in your lesson plans, if you would like to see the standard wording, simply mouse over the standard. If you would like to delete standards you have already clicked to add, just click on the red X next to that standard.

Once the standards are in your lesson plans, if you would like to see the standard wording, simply mouse over the standard. If you would like to delete standards you have already clicked to add, just click on the red X next to that standard.
Lesson Plan Notes
After you have chosen your standards, write your notes that go with this lesson. This is the section where you would put anything you would have written in the small square of your old paper lesson planner book. Notes can include anything you want them to include, for example:
instructions for teaching the lesson
teacher materials/resources
differentiated instruction notes regarding specific students
intervention documentation
group lists or rules
essential questions
big question/idea
enduring understanding
word study/spelling lists
materials needed for the day
Formatting is completely customizable so you can show your creative side or just make something stand out. You can link to URLs, highlight, bold, italicize, change the font, link to the web, add pictures, and add smiley faces to your heart's content. (Rich Text Formatting is the option that allows you to edit font attributes, so make sure it is turned on in your Preferences)
Save
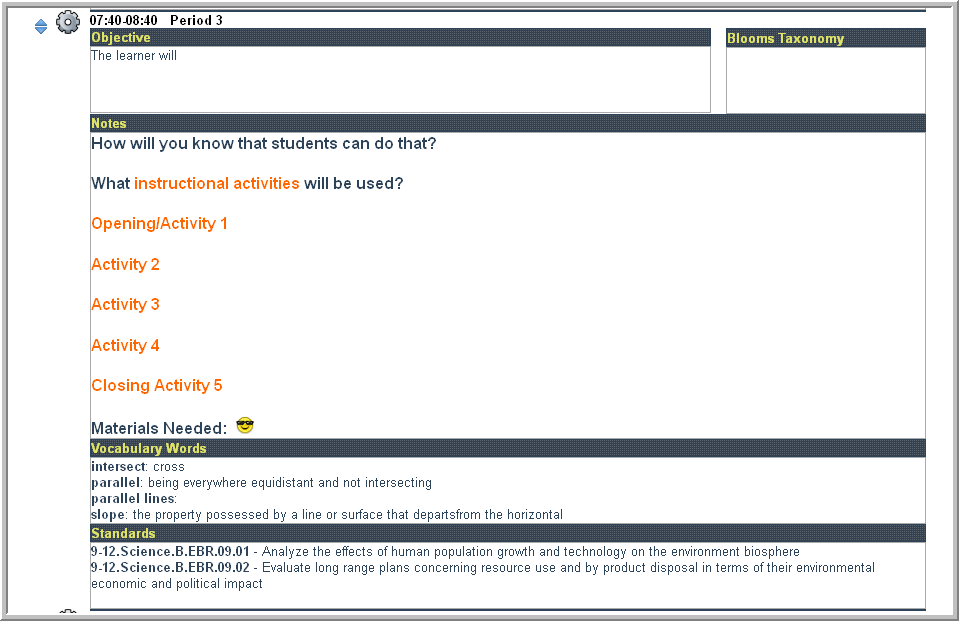
When you have finished, click Save. When you click save, you will be brought to your complete lesson plan page, and you will see your lesson plan building block by block on a daily lesson plan, or day by day for the subject lesson plan.
Information Blocks
Information blocks are your own creation for your own needs. Think of them as Sticky Notes in your lesson plan book. Things you might want to include in your information blocks would be:
materials needed for the day
duty schedule
reflection
lunch procedures
bathroom breaks
pullout student instructions and schedules
assembly procedures
student groups
bus riders
Information blocks are perfect because you can put them anywhere in your daily lesson plans and type any information you would like. Information blocks will show at the bottom of the subject lesson plan.
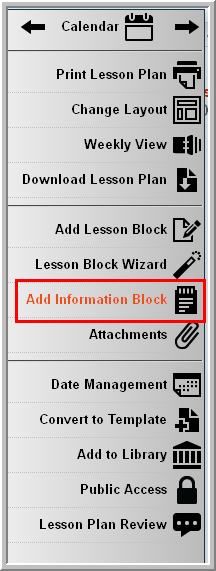
Click the 'Add New Information Block' icon at the menu on the left side of the lesson plan.
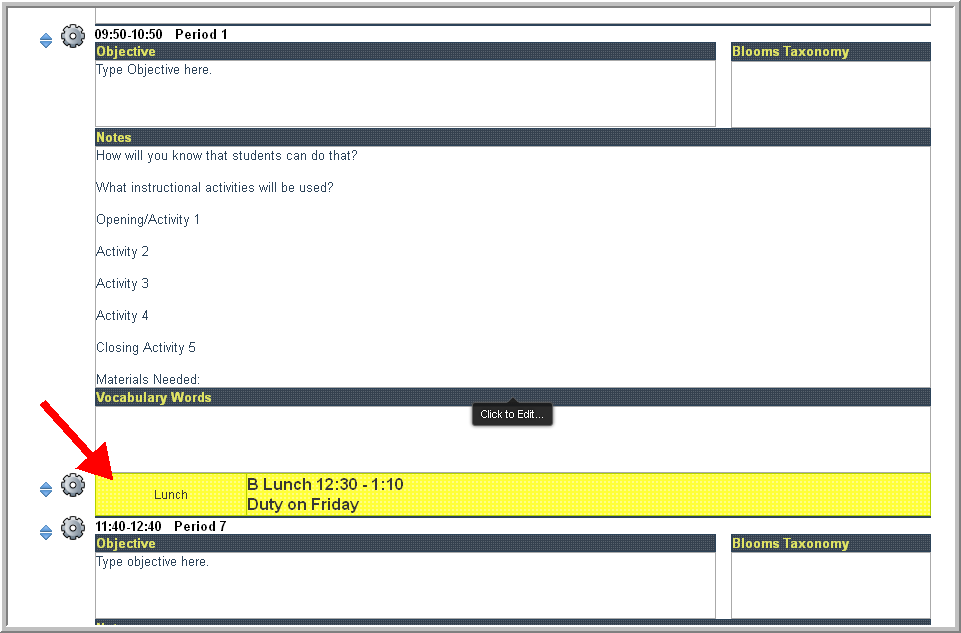
There are 2 types of information blocks. Choose the type of information block--Inline that line up with lesson blocks (not available in the subject plan), or the Vertical which always appear at the bottom of your lesson plans. In-Line Information Blocks can be moved up and down in the daily lesson plan between lesson blocks in a schedule type order. Vertical Information Blocks are always positioned at the bottom of your lesson plans. Give your Information Block a heading, and then type your information and format as you please, and then click Save. Information Blocks will appear similar to this within your daily lesson plans.
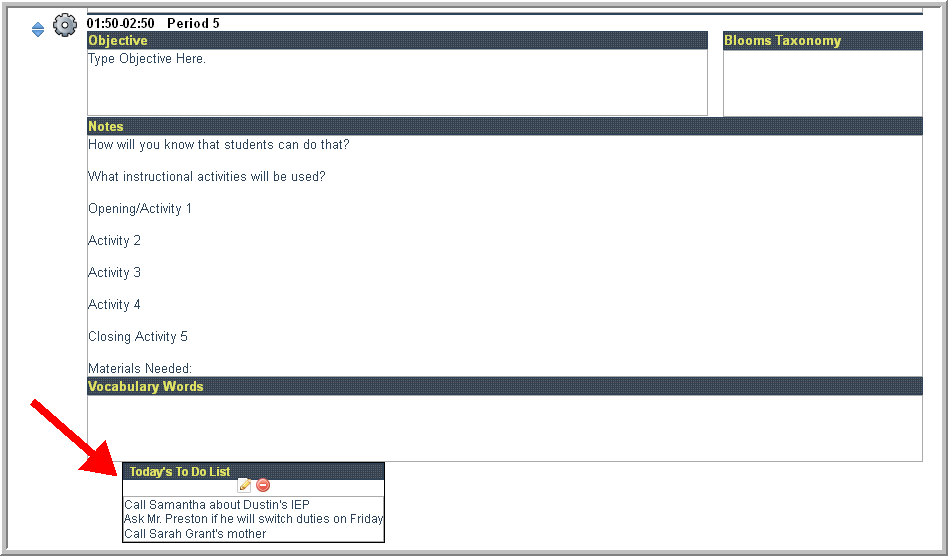
Subject lesson plans will have information blocks that will look similar to this:
Continue adding lesson blocks and information blocks as needed for the day's lesson plans. You can move your lesson blocks up and down on the daily lesson planner by using the small blue arrows at the left of the lesson block to click and drag them where you need them. There are also layout options that allow you to view the Daily Lesson Plan differently.

The Subject Lesson Plan has layout options in the top right corner that allow you to view your lesson plans differently.
When you have finished adding your lesson and information blocks, and your lesson plan is complete you have the option of making the lesson into a template, making it public, putting it in the Library for others to see, changing the date or copying it to another date, or making it public for a substitute teacher or your parents. The icons for each of these options are at the top of your lesson plan, and there is a tutorial for each of the features.
New Calendar Features
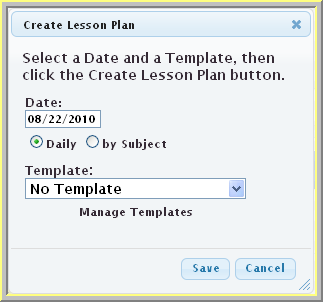
You can create a lesson plan, move a lesson plan to a new date, and copy to a new date right from your calendar. Click on the Quick Links the top of the page on the right to get to the Calendar. You can create a lesson plan from the calendar by clicking a date on the calendar and choosing Create New Lesson Plan.
You can choose to build a lesson plan from scratch or choose a template to start your lesson.
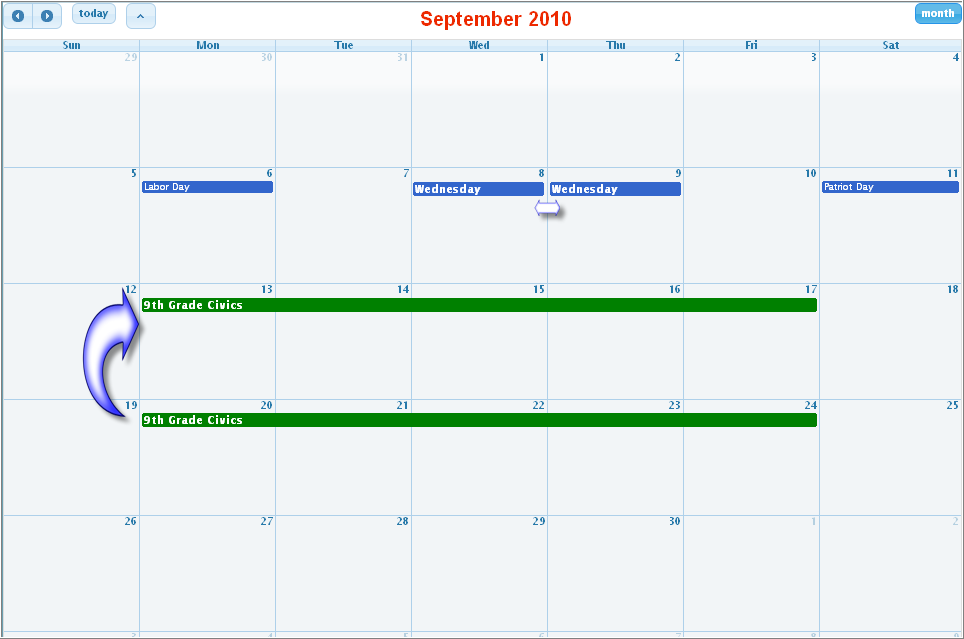
To change the date of a lesson plan, simply click and drag the lesson plan to the a new date. If you would like to copy and paste it to a new date, you will use ctrl-click-and drag.